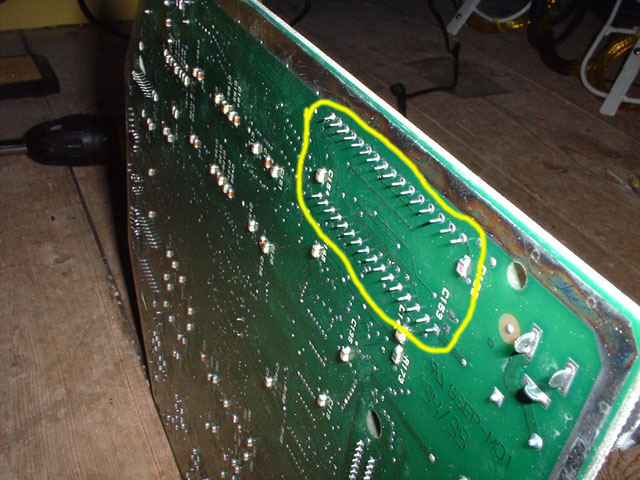
Step 3 - Desoldering the ROM
Now we are ready to desolder the ROM. First make sure you are aware which pins you need to be desoldering. I have highlighted the pins on the next picture for you.:
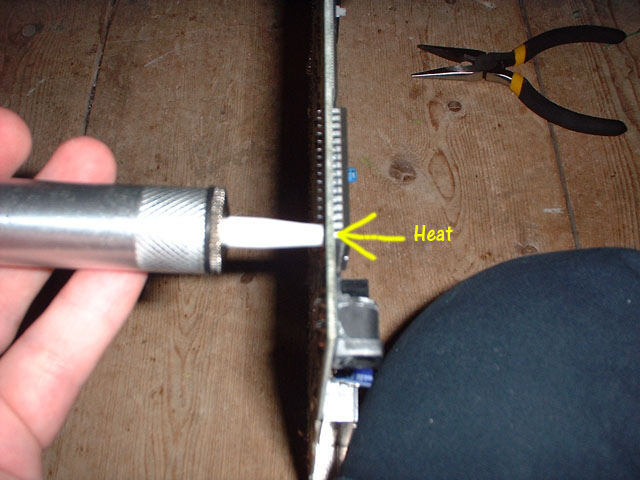
The method I have used to desolder the pins is to apply the soldering heat from the component side of the board to a pin for about 5 seconds and then
use the solder sucker to remove the solder from the solder side of the board (whilst the heat is still applied). Make sure you only do this for one pin at a time and
don't hold the heat on for too long or you may damage the chip and scorch the board. I lined the solder sucker nib up with the pin prior to applying the heat.
When you have done this for each pin you should be able to see through the holes if you hold the board up to the light.
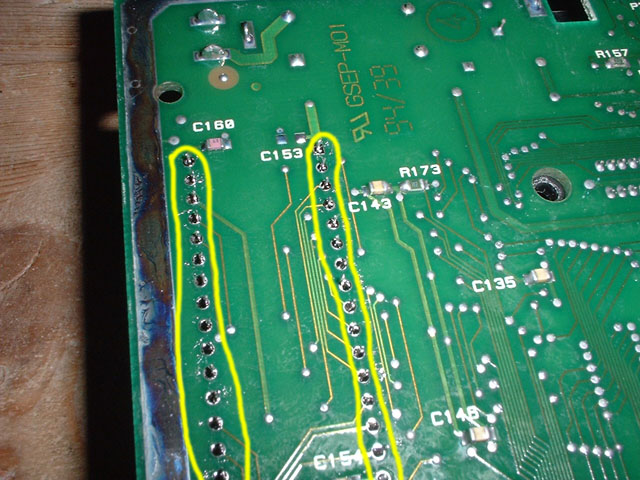
This picture shows the pins once the solder has been sucked off. Now in a perfect world the chip would just fall off the board and you would be done desoldering. However this isn't a perfect world and most likley the chip is still firmly heald in place.
I believe this is because there is still some small amount of solder holding the pins to the sides of the holes, what we need to do is either remove this
solder or break it away somehow. I went for the break it away as I spent about an hour trying to remove it :). I have done this by using the needle nosed plyers like this :
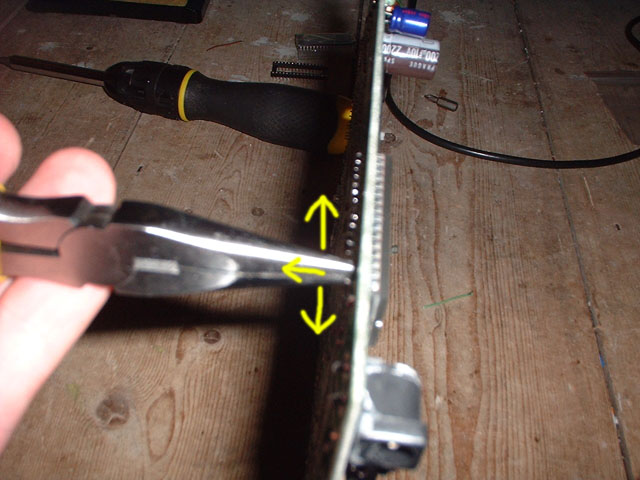
What I am doing here is pulling gently on each pin with the nib of the plyers right against the board and then gently but firmly waggling the pin up and down.
This should pull the pin away from the solder holding it in place, you will likley feel it give and maybee hear a slight crack. Repeat this for each pin.
Make sure you don't pull too hard or you will snap the end of the pin off!
The chip hopefully should now just pull away, but it is likley that it won't so carefully with a flat headed screwdriver try and pry it from the main board, be
careful not to damage any of the tracks or scratch the mainboard with the screwdriver.
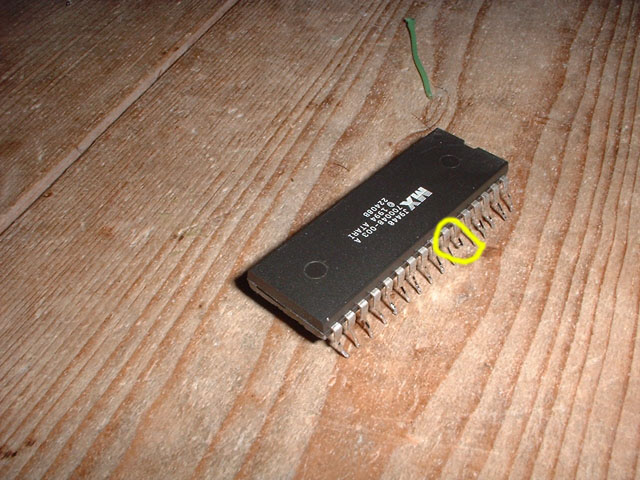
Here is the old Boot ROM desoldered for the board, the highlighted pin is one that I snapped the end off DOH!
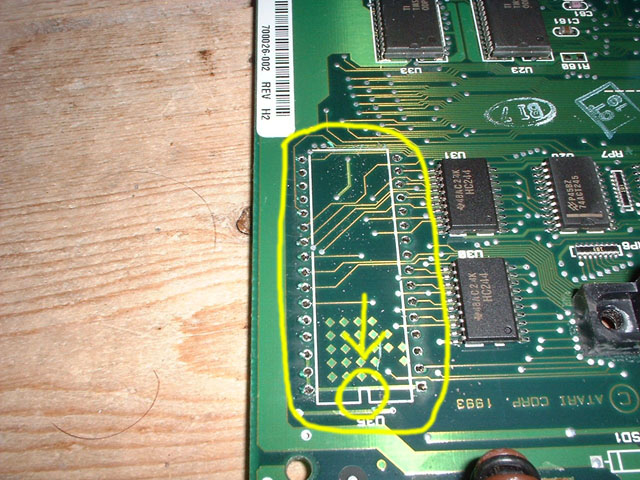
Here is where the ROM used to sit, and where we are going to put the socket. Pay attention to the notch on the artwork on the PCB. This indicates the
orientation of the chip.
Step 4 - Soldering fun
Copyright Graeme Hinchliffe 2003