Equipment needed
One crucial bit of equipment is a steady hand (And about 12 of them, so having a friend handy whilst you do this would be helpful).
Here is a picture of the tools I used to do this modification:
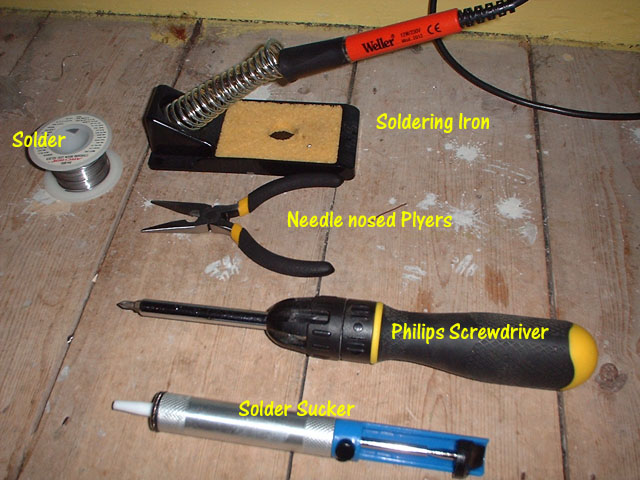
From the top down the picture:
Soldering Iron : This is obvioulsy required and you can't do a lot without one. Make sure your soldering iron is suitable,
ie it's not the sort used for welding, or high voltage cables, but is an electronics soldering iron. This Iron is about 15Watts (I think), and has a small point
It makes life so much easier to have a fine point soldering iron. So you get an idea of what I mean by a fine tip here is a closer look:
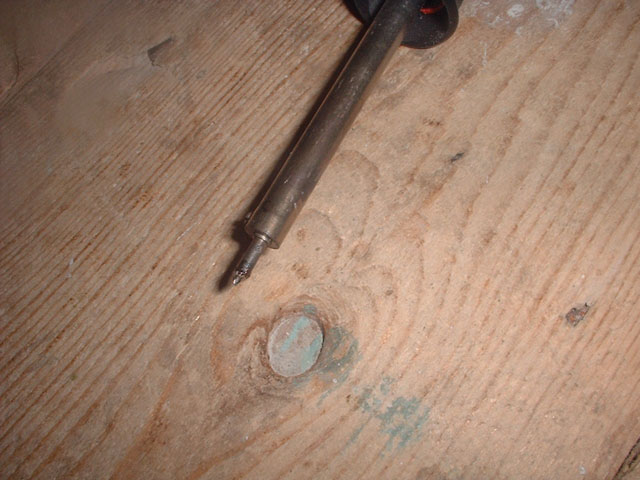
If you don't have one, go and buy one they are not that expensive, and it could mean the difference between a BJL modified Jag and a piece of grey
plastic that makes a good Jag stunt double.
Solder : Kind of essential too, you will be resoldering pins back to your Jaguars main board, so you will be needing this.
Again make sure it is appropriate, acid core solder or the solder used for plumbing are NOT suitable. If you have it use a nice fine solder too,
helps stop you ending up with big blobs on the pins.
Needle Nosed Plyers : You will need these if you happen to not have strong thin fingers. The RF sheilding in the Jaguar has
small metal tags which need to be bent straight or twisted to remove the Sheilding. So unless you have uber strong fingernails these will be very useful.
They will also come in VERY handy when you get to the desoldering chip removing stage.
Philips Screwdriver : Kind of obvious, you need to get into the Jag for this mod, so you need this to get it open :) A flat headed screwdriver
can come in handy in the chip removal section, but it is possible without.
Solder Sucker : Absolutely essential along with the solder and soldering iron.. if you don't have one you won't be able to
do this mod. There are two types I have seen a vacuum bulb and the sort shown here. It works by a spring loaded plunger that when the catch is released
sucks the moten solder into the tube and off the board. I don't know if the Vacuum bulb version is as effective, this one cost me about Ł10 from
Maplins You should be able to get all parts from here, or your local electronics store if your not in the UK.
You will also need one of these :
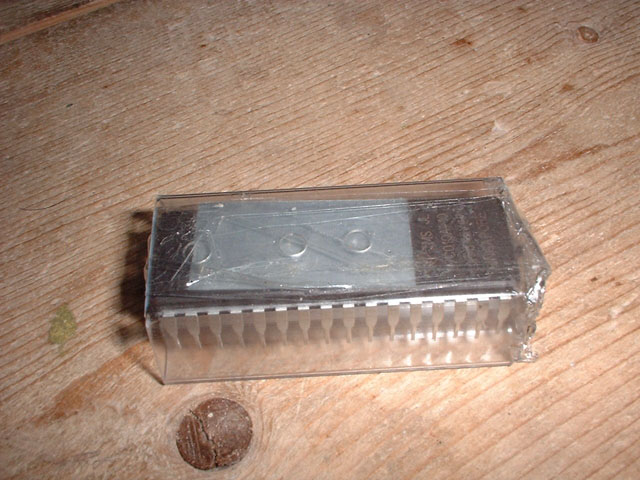
This is the BJL Boot ROM that will be going into your Jaguar. This chip I got from Lars (thanks) and is in a protective sleave. If you have one without
the little window covered in the top, it is worth covering it up with a sticker. Sunlight WILL erase an EPROM eventually so save yourself some hassle and
cover that window :). If you don't have one of these then ask around on a Jaguar forum and I am sure someone will be able to get you one. I will soon
be in a position to provide these myself so you can always ask me. So try asking on Jaguar Interactive 2 forum.
Not essential but handy for the future is one of these:
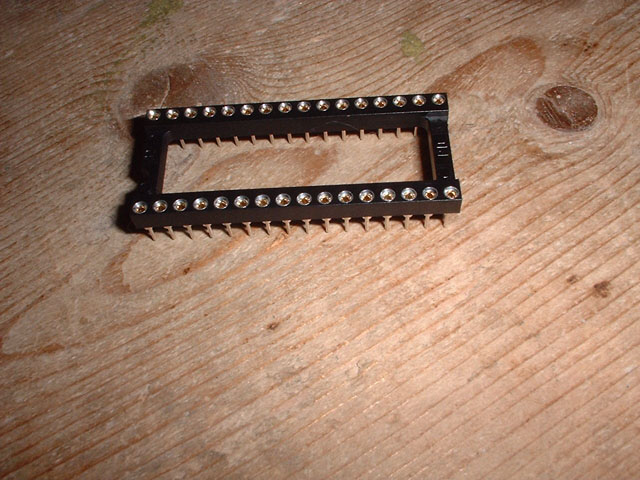
This is a turned 32 pin socket (cost around Ł0.79 - Maplin part code FZ65V) Fitting this instead of soldering the BJL directly to the board makes it
possible to change the ROM much easier. You will appreciate this once you have desoldered the current ROM :). You may think now that you will be happy
with just BJL, but in future a newer version may be released, you may wish to go over to a Stubulator ROM, or even just to test your soldering is right
once you have finished (you already know your current boot ROM works, the BJL is most likley unkown to you so you can use your current ROM as a test).
Its not required but I think it makes things nicer for the future. You could always use a cheaper socket if you like, as long as it's 32pin DIL.
Of course without the following there is absolutely no point:

make sure the Jag you are modding works BEFORE attempting the mod :) Check that both ports work as you will need both (player 1 and 2) even if you
live on your own in the middle of no-where, port 2 is used to upload the code to the Jaguar.
So all parts ready... then lets get started
Step 1 - Opening the Jag
Copyright Graeme Hinchliffe 2003